Value Drawing - 5 Simple Steps To Draw With Value
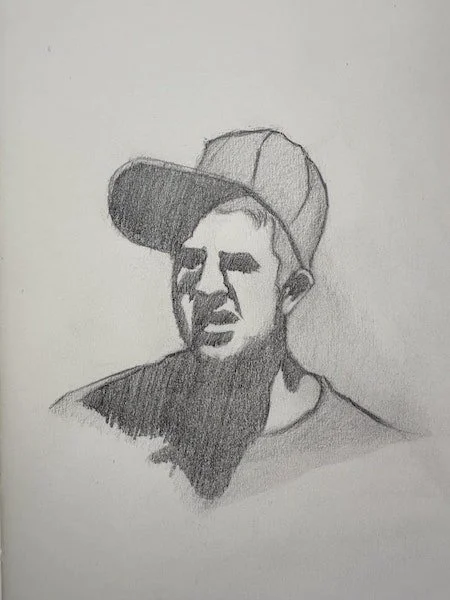
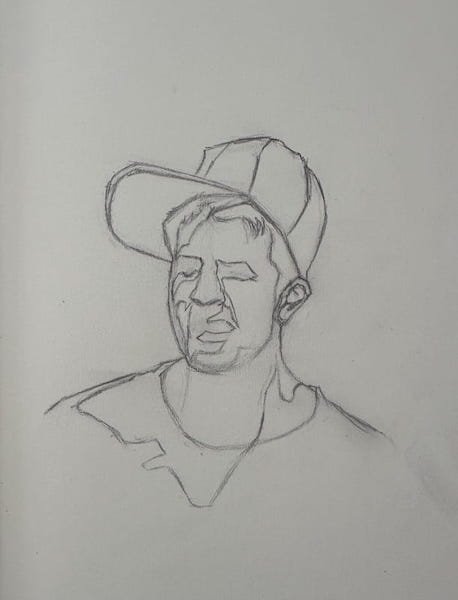
Do your drawings look like this?

But you’d like them to look more like this?
Then keep reading, as this article will show you in 5 simple steps to make the shift from linear drawing to value drawing.
Why does Value Drawing matter?
Value drawing is a critical part of realism and a key drawing fundamental.
If you want your portraits, figures and landscapes to look realistic, you should learn everything you can about drawing with value.
Values create contrast, atmosphere, a sense of form, three dimensionality and much more.
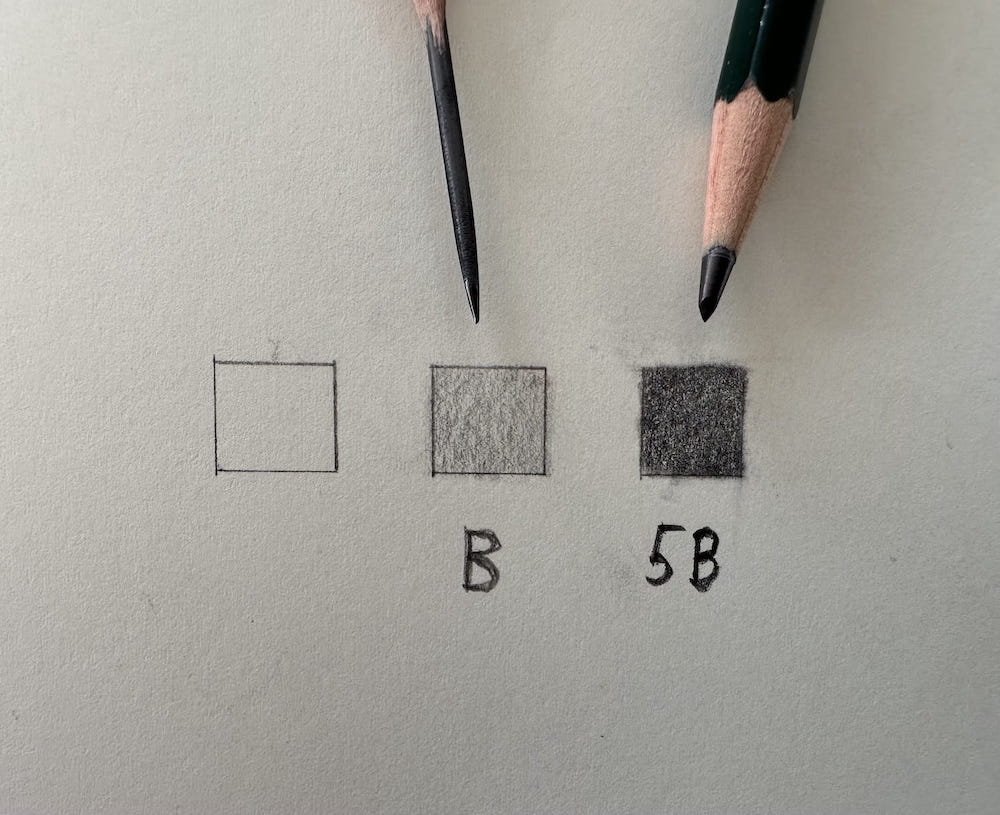
The easiest way to think of value is on a scale. Let’s take a look at this tonal scale in pencil.
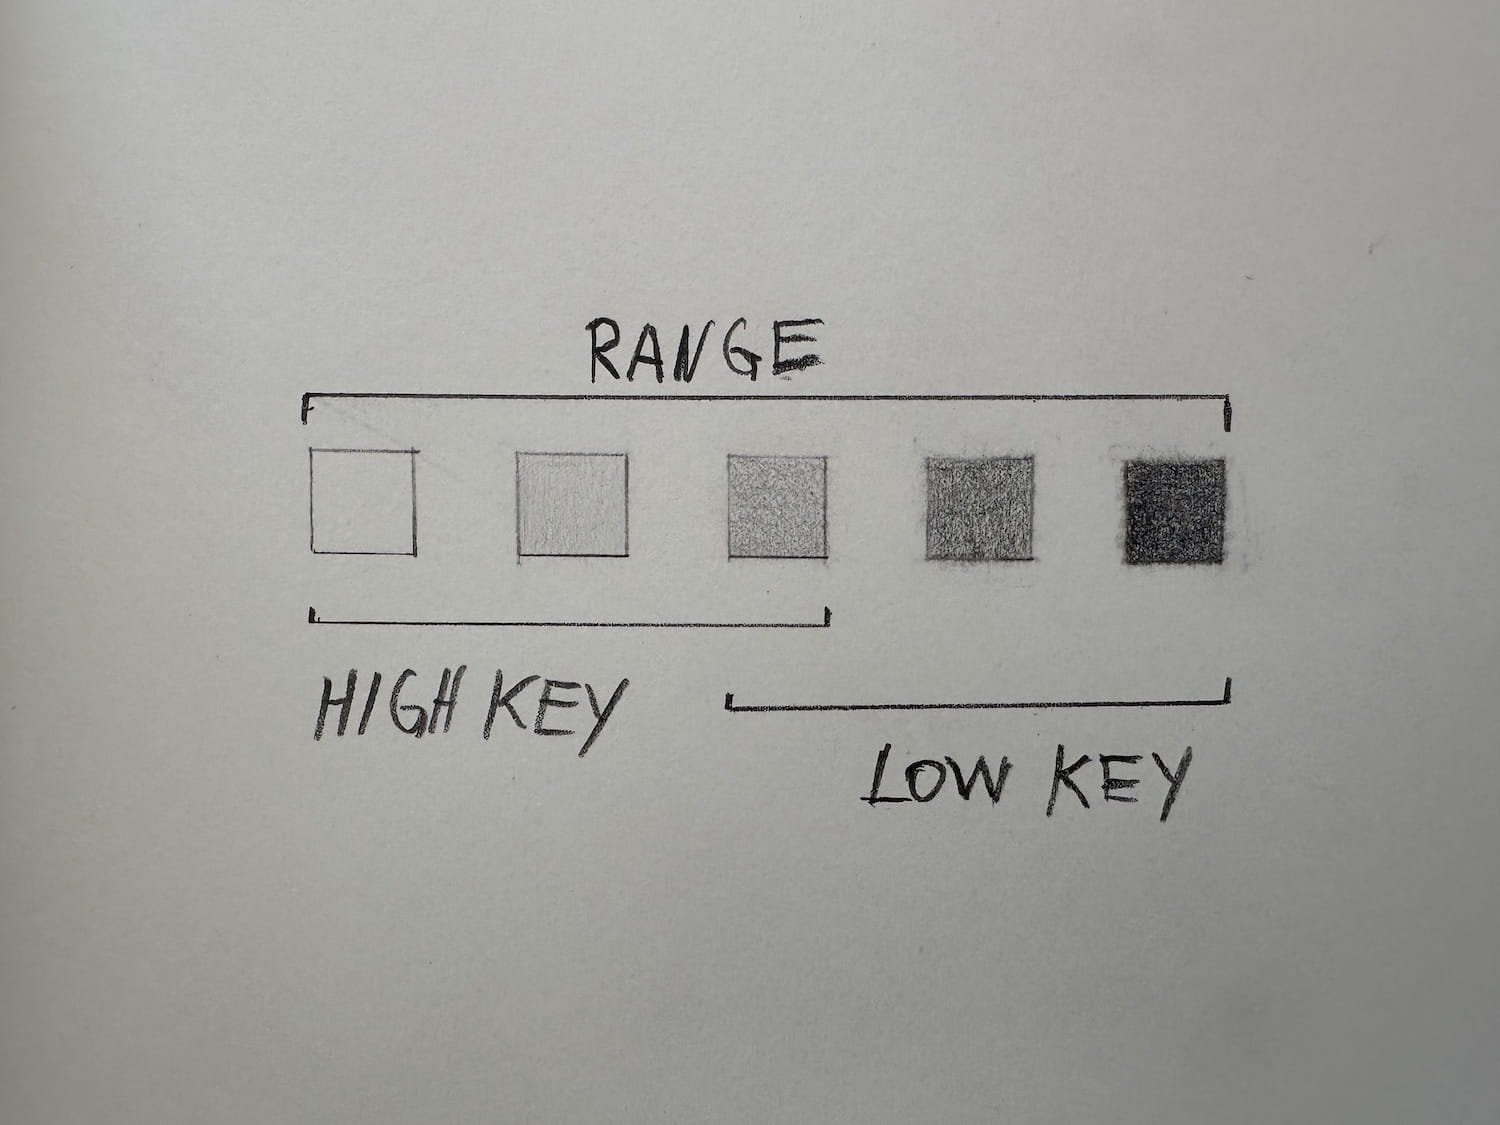
Tonal scale in pencil.
This tonal scale has 5 different values. The difference between the darkest and the lightest is called tonal range.
Drawings that use lighter values are often called high-key drawings, as opposed to low-key drawings that use darker values.
What tonal range you use, and how many steps on the scale, is a design decision.
But let’s not make it complicated. For the purpose of getting acquainted with value drawing, all you need is 2 values.

Photo by Dynamic Muse.
In the photo above I removed the color, and increased the contrast. As you can see it can be simplified into 2 major shapes: The shadow shape and the light shape.
That’s the minimum you always need.
Alright, with those basic concepts in mind, let me show you the technical, material and mental shifts you need to make, in order to draw in value!
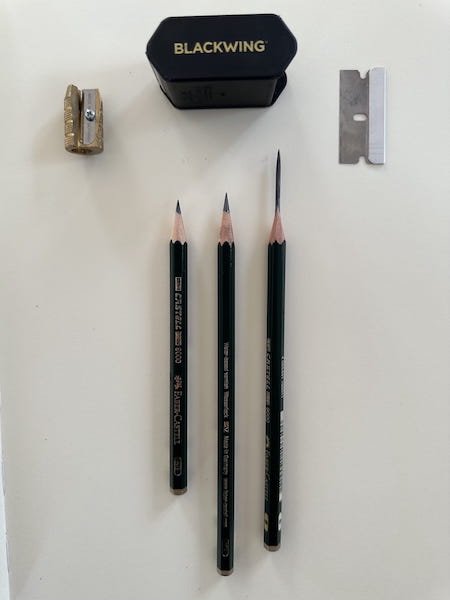
Step 1: Values Drawing Grips
Most beginners draw how they write: With a tripod grip.
That’s a great grip that will remain useful, but draw in value you need to expand your arsenal with the overhand and back-end grip.

Tripod, overhand and back-end grip.
Simply put:
The tripod grip is great for linear drawing.
The overhand grip for tonal masses.
The back-end grip of subtle rendering that needs a light touch.
Try it yourself! Draw a few lines, shapes, tonal patches and gradations in all three grips.
Did you feel the difference? Using all grips will give you much more versatility and control compared to just using the tripod grip.
To get even more control, you can experiment with different distances between tip and thumb/index finger for each grip, as well as angles. The general rules are:
The closer you grip to the tip, the more linear and darker the marks
The further away from the tip, the more tonal and lighter the marks
The bigger the angle between paper and pencil, the more linear and darker the marks
The smaller the angle between paper and pencil, the more tonal and lighter the marks
Just try it once, and it will make immediate sense to you. From there it’s just a matter of using these new grips, until they become second nature.
Your grip technique, is the one tool you can take anywhere with you for more subtle value control.
Now it’s time to fine-tune your materials for tonal drawing.
Step 2: Value Drawing Material Hacks
There are 3 material hacks for value drawing versatility and control.
These hacks will help you draw very soft tones, very dark tones, create special effects, and anything in between.
Value Drawing Hack 1: Pencil Sharpening
A long, bullet-shaped pencil lead gives you the most control.
Pencils sharpened with a razor blade and sandpaper are the best at home studio option. It takes a bit of time to sharpen them that way, but once they are sharpened you can draw hours without having to sharpen again. And the versatility and control of your marks is unmatched.
For travelling I recommend getting a long-lead pencil sharpener. I use the one by Blackwing. It simply creates a longer lead than your average sharpener, which is your best option while travelling.
Value Drawing Hack 2: Smudging
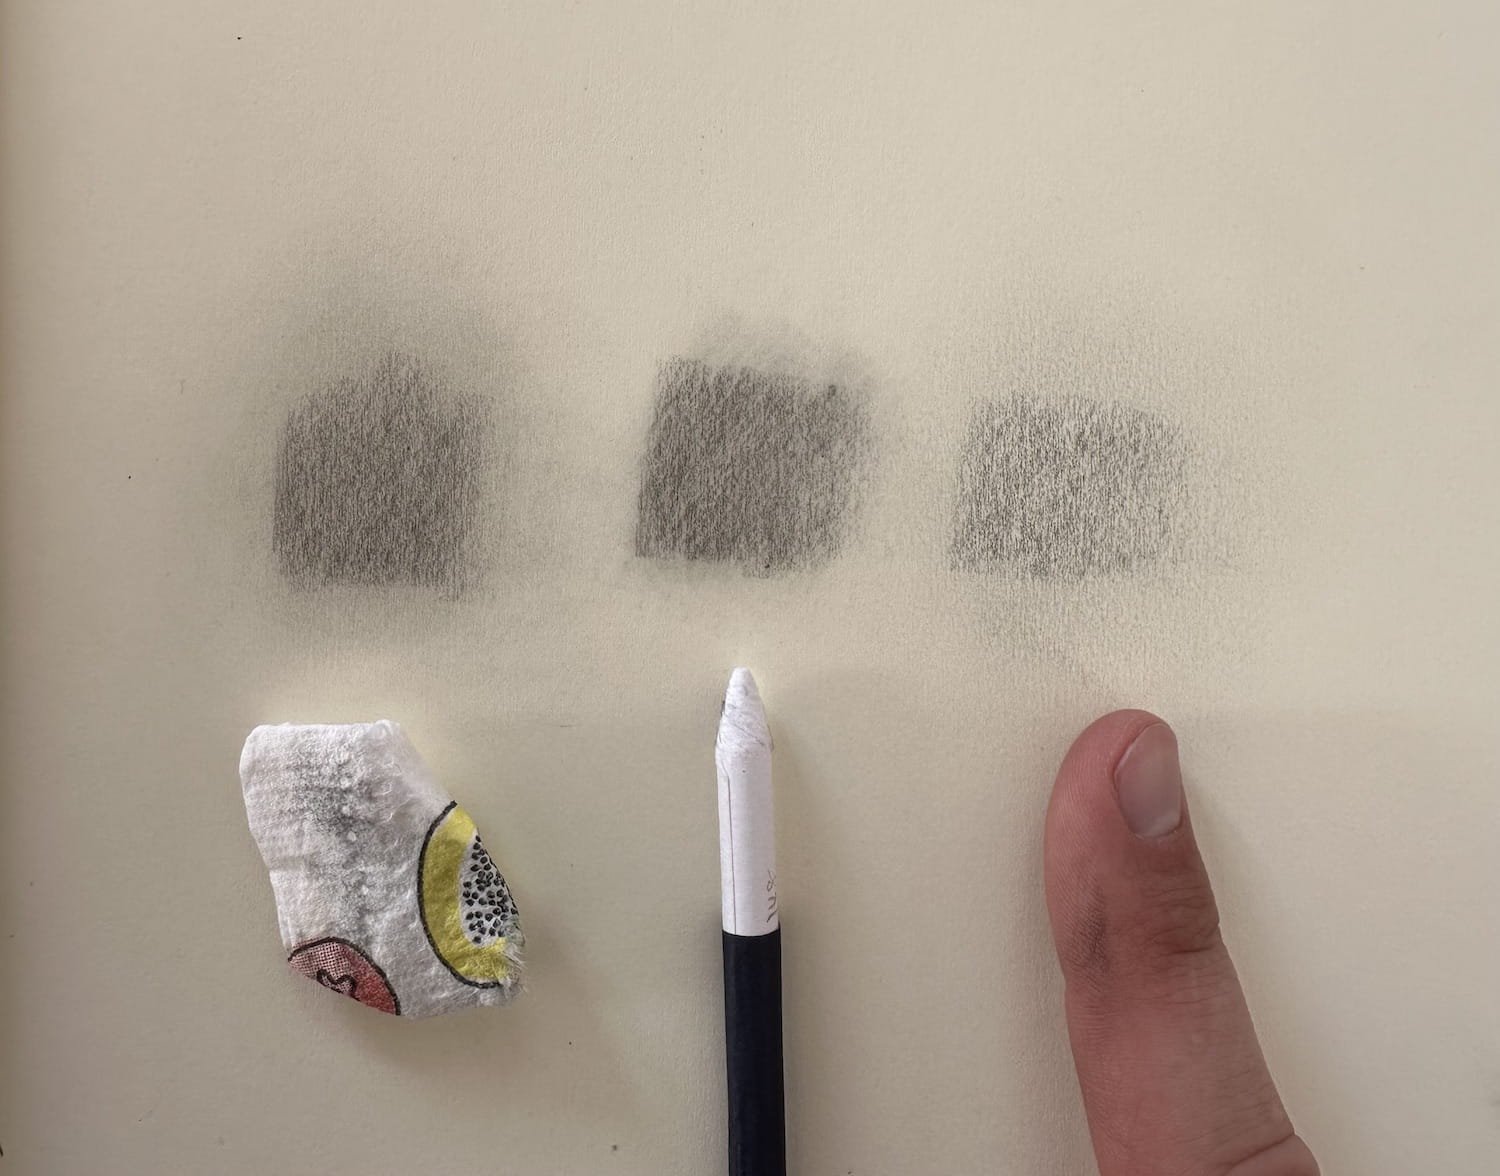
Smuding tools. One of them you always got with you.
Smudging allows you to soften edges, smoothen tone, and create softness if your drawing calls for it.
Obviously, your fingers are an easy option for smudging while sketching on the go. Similar to the grip techniques you can take it anywhere with you. A simple paper tissues also is easy to carry out.
It’s just a matter of experimenting to see what gives you the effect you like.
Value Drawing Hack 3: Draw With Erasers
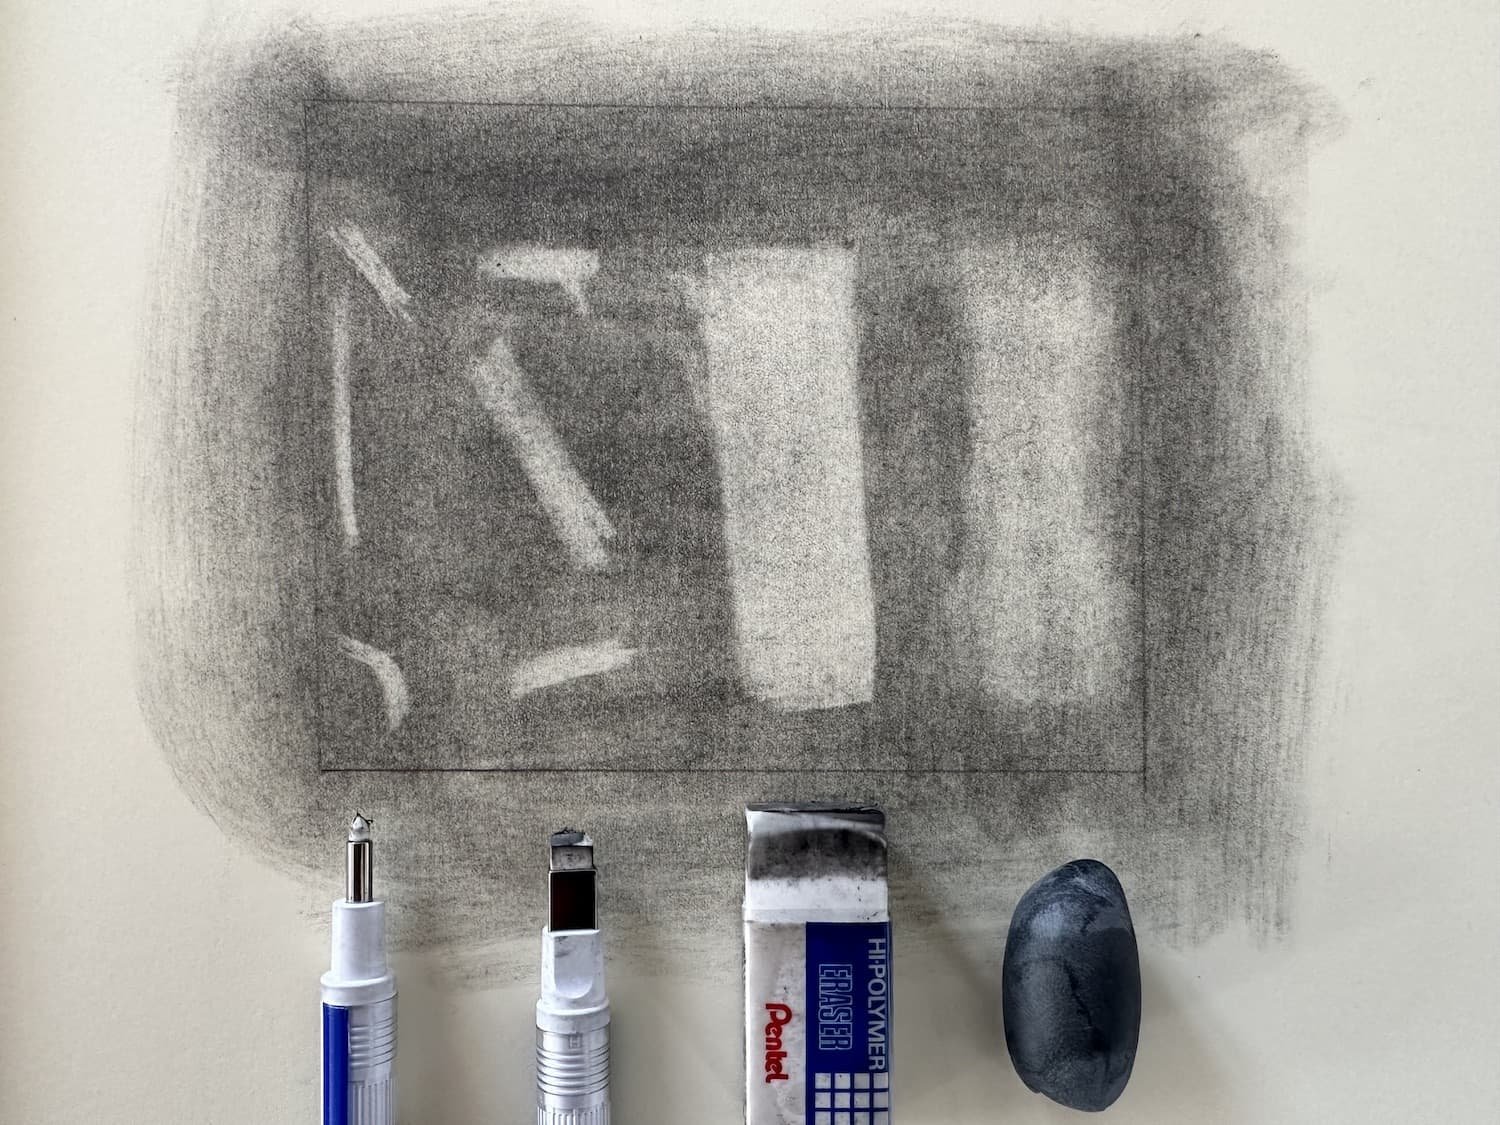
Erasers are drawing tools.
Most people think erasers are there to… well… erase mistakes!
In the world of value drawing though, erasers become a drawing tool in their own right. Especially when designing the light side of your drawing on a paper that’s previously been toned with graphite powder.
The kneaded eraser can make whole areas of your drawing lighter by rolling it over the drawing, without destroying the line work underneath. It’s like a brightening tool on a laptop.
The mono erasers allow you to create more subtle effects and lines on tonal masses. They are great for refinement.
A normal white rectangle eraser is best for cleaning up broad areas, e.g. when you want to make areas of the background white again, after you laid a soft tonal background with graphite or charcoal.
Experiment with all three!
Step 3: Decide On A Tonal Scale
Alright, time to draw.
But before we do, it’s important to plan out your tonal scale.
You do that by answer three questions:
What’s your darkest dark?
What’s your lightest light?
How many value steps will you use in between?
The greater the difference between the lightest light and the darkest dark, the stronger the contrast in your drawing, and the more “pop” you get.
More value steps equal a more refined look, even though you can create a lot of realism with just 2, 3, 4 or 5 values.
Decided? Good, I’ll use a simple 3 value scale for the value drawing examples.
Step 4: Design Shadow & Light Shapes During the Lay-in
If you’ve drawn linearly, you know what a lay-in is. It’s how you’ve been drawing all along.

Portrait photo reference by earthsworld.
To move from that to a drawing that uses value, you must learn to separate light from shadow with a line. This line is often called the terminator line, or the line that separates the light from the dark.
Separating light from dark with the terminator line.
Important to note: That terminator line creates shadow shapes and light shapes. The design of these shapes strongly influence the “read” of your drawing (To learn more check out my definitive guide to drawing with shapes).
So consciously pay attention to the shadow and lights shapes you create, when establishing the terminator line.
Step 5 : Fill Shadow Side With Tonal Mass
That’s where the rubber meets the road. Take the overhand grip, depending on how dark you want to go hold it closer to the tip or further way from it, and fill in the shadow side with your tone. If you want to go really dark you can also use the tripod grip.

Notice how the contrast creates a sense of form.
It’s key to lay in the tone evenly, with confident, parallel strokes that go from top to bottom. Then lift the pencil and do it again (don’t go zig zag). You want the shadow side to read uniformly.
See how it creates pop?
Congrats! You’ve made the shift to value drawing.
Bonus Step 6: Refining
Value drawing is a deep topic. To get to a strong finish, you’ll need to learn about modelling factors, lighting scenarios and edges - all advanced concepts that I left out to keep the article length reasonable.
I’ll plan to write articles on those topics eventually, and link to them here.
Even without those concepts, there are simple simple things you can do to refine your drawing. It comes down to taking a step back, looking at your drawing, and asking yourself a series of questions, such as:
Is my darkest dark dark enough?
Is the shadow area dark enough? Is the light side light enough?
Where are the highlights?
Where on the terminator line is the edge hard, soft or lost?
Where should I use straight lines for a graphic read, or cross contour lines to enhance form?
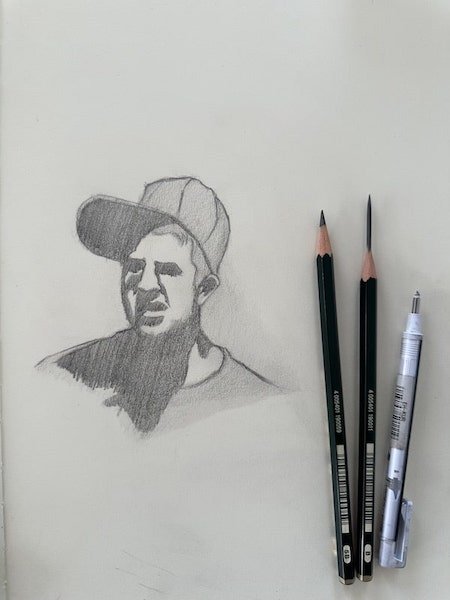
Final value drawing.
Closing Thoughts
Value drawing opens up a whole new world of drawing. This article introduced you to the basic value drawing concepts.
Don’t stop here - integrate value drawing techniques into your drawing process, or apply them to a toned paper drawing.
It’s well worth the return!
If you enjoyed this article, and you’d like help mastering value drawing with demonstrations, exercises, and feedback, as well as other fundamental drawing skills - that’s exactly what Foundations of Realism is designed for. It builds directly on the ideas in this article and shows you how to train them as one connected system.
You can check it out below.
Until next time!
Felix