Toned Paper Drawing - A Beginner’s Step-By-Step Guide

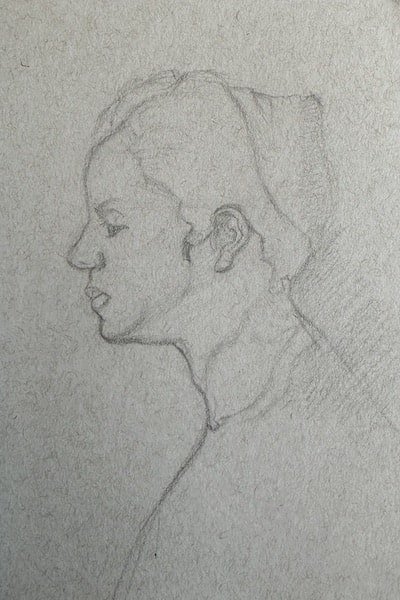
Study of portrait by Velázquez on toned grey paper.
Most people start drawing on white paper. It’s what we’re all used to after all.
And while you can create beautiful drawings on white paper, there’s an alternative: Toned paper.
In this article, you’ll learn the right material combination and process to create a beautiful toned paper drawing.
If value drawing is new to you, I recommend checking out my value drawing guide.
Alright, let’s first understand what toned paper is, and it’s advantages over white paper.
What Is Toned Paper?
Toned paper is simply a drawing paper that isn’t completely white, meaning it has a value that is darker than white.
The most commonly used toned papers are toned grey or tanned. Whether to use grey or tanned really comes down to preference and what effect you are after, more on that in a second.

Examples of grey and tan paper drawings.
I recommend getting one toned sketchbook in addition to your white paper sketchbook and experiment. Personally I like my Starthmore 400 toned paper sketchbook in grey.
Why Draw on Toned Paper?
There are 3 main reasons to draw on toned paper. Some economical, some artistic.
Reason 1: Save Time
In nature, pure white rarely shows up.
Most things that you think are white, are a light variation of grey when you squint at it.

Even on a sunny day, what you think is white, is mostly grey.
That’s why toned paper saves you time. Instead of having to tone down a white paper with graphite powder, you can start drawing immediately.
You have a base of tone “out of the box”, and can go higher in value using white pencils, and darker in value using dark pencils.
Your mid-tone is already there. It saves you the time of building up tone, which for most drawings is a necessity.
Reason 2: Get Strong Contrast
By punching in lights with a white pencil and darks with a black pencil, your toned paper drawings get a wide value range, also known as contrast.
A common combination is to use Prismacolor Premiers for the very white and very black areas, and Prismacolor Verithin or Colerase for the slightly white, and slightly black areas.

A simple value scale on toned paper. Notice the nice range.
On white paper you have to build up contrast by adding more darks on both the light and shadow side, given the light side is already covered by the white paper.
On Toned paper you can build contrast by drawing into “both directions” - the light side with a white pencil and the shadow side with a black pencil.
Toned paper is great to practice drawing with a full value range
Strong contrast creates impactful drawings.
Reason 3: Different Feel & Style
The look and feel of toned paper drawings is different to drawings on white paper.
The main reason is the temperature of the tone.

Drapery for a kneeling figure by Leonardo Da Vinci.
Toned grey paper is a cool grey, while tanned paper is a warm grey. Naturally, toned grey paper creates a very atmospheric, cold look, while tanned grey creates a warm, desert like feel.
If you like the look of toned paper drawings, like the one of above from Leonardo Da Vinci, collect a few master drawings and study them.
At first it might be hard (any new skill in drawing is hard), but overtime you get great at judging which papers is best for which kind of drawing effect.
Toned Paper Drawing Step by Step
Alright, let me show you how I drew the study of Velázquez’ Head of a Girl, on toned paper.
Toned Paper Drawing Step 1: Lay-In
Start by laying-in the subject using a black Prismacolor Verithin pencil. This step is no different to white paper drawing.
Step 1: Lay-in
Toned Paper Drawing Step 2: Add Darks On The Shadow Side
Given the lay-in is done, fill in some darks on the shadow side, still with the Prismacolor Verithin.

Step 2: Add darks on the shadow side.
The Verithin pencil allows for a slow build-up of tone and is great for dark mid-tones. Again, this is no different to the white paper approach.
Once you’ve drawn a decent amount into the dark side, it’s time for…
Toned Paper Drawing Step 3: Add White On The Light Side
Here we are entering unique toned paper territory.
Take the white Prismacolor Collerase pencil (or Verithin), and start modeling the form on the light side, using cross contour drawing.

Magical Step 3: Add white on the light side.
As you slowly gradate and layer on white, the drawing starts to feel three dimensional and come off the page more and more.
That’s the magic of toned paper: Drawing into both the darks and the lights, you get that subtle immediate read of form, if when there’s not a lot of contrast yet… that’s for the next step.
Toned Paper Drawing Step 4: Push Darks Darker
Now it’s time to push the darkest darks further. For that use the Prismacolor Premier, which can create much darker blacks than the Verithin or Colerase line.

Step 4: Push darks darker.
The Premier is best used for the darkest areas in the focal point (in this case the eye), and other dark shadow areas like occlusion or cast shadows.
If done right, this step will give your drawing even more “pop”, which gets you ready for the last step…
Toned Paper Drawing Step 5: Push Lights Lighter
Finally, take the white Prismacolor Premier and add in highlights or increase the brightness of certain areas of the light side. Similarly to the black pencils, the Premier line allows for brighter whites, than the Verithin or Colerase line.

Final Step 5: Push lights lighter.
And voila! You got a finished toned paper drawing.
Conclusion
As you can see, toned paper is a great tool for practicing full-value range drawings, and modeling form.
Once you add in the white, you’ll start feeling the magic of drawing on toned paper.
If you enjoyed this article, and you’d like help turning these fundamentals into a clear, repeatable practice, then check out Foundations of Realism below.
Until next time,
Felix